Chicory, Bacon & Comté Cheese Tart


Comté is a new addition to the cheese drawer in my fridge. I'm not entirely sure where its been all my life but in a bid to make up for lost time I set out to make something to showcase its brilliantly nutty flavour. I hear its particularly brilliant for fondue, but I'm waiting for the Swiss Queen, Flick to show me that. 


Depending on where the farms milk is from, how long and where its aged, comté can have such a diverse taste. Anything from nutty, creamy or more sharp and fruity. That's what makes it so perfect to melt, grate, shave or bake. Any which way you want it! When comté sent me some samples and asked me to come up with a recipe for Mother's Day I was excited for the challenge. 

This tart balances the natural crisp bitterness of chicory with the smooth buttery comté. Packed with crispy bacon, lashings of mustard and thyme. Serve with some buttery potatoes and a crisp green salad with some Sancerre because its practically Spring now. Perfect for a weekend catchup with my Mum.


C H I C O R Y,   B A C O N   &   C O M T E   C H E E S E   T A R T
(makes one 9 inch tart)

1 pack of ready rolled shortcrust pastry
2 tbsp butter
250g chicory, about 2-3 heads
100g bacon
3 eggs
240ml double cream
1tsp mustard, english or dijon
1tsp fresh thyme leaves
pinch of salt
1/4tsp freshly ground nutmeg
150g grated comté cheese, grated
  • Heat the oven to 180 degrees and lay the shortcrust pastry into the tart dish, using a ball of dough to gently push into the edges. Use a knife to trim any excess from the top.
  • Chop the chicory into quarter inch slices and remove the core whilst melting the butter in a griddle pan. Cook the chicory for 5 minutes until tender. Remove from the pan.
  • Roughly chop the bacon and cook the bacon in the same griddle pan until golden and crisp.
  • In a bowl, whisk together the eggs, double cream, mustard, thyme, salt and nutmeg.
  • In the prepared tart dish, layer the chicory, bacon and comté before pouring over the egg mix.
  • Bake in the centre of the oven for 45-50 minutes until the crust has turned golden. The centre of the tart will look a little wobbly but this will firm as the tart cools.
  • Leave for 20 minutes before removing from the tart dish to serve.

This post is in collaboration with Comté who sent me some samples to try as part of their #MothersDayTheComteWay campaign.

Gizzi's Chicken Pho with Rice Noodles


When I first tried pho last year I was absolutely amazed how something seemingly so simple could have so much flavour and need very little work. This is now my go-to lunchbox recipe, so much so that I ate it for 4 consecutive evenings at work last week. Cooking for one, hey?

As Gizzi suggests, I take a jam jar full of stock to work, heat it up in the microwave and throw it over some shredded chicken and whatever veg I have in. Rice noodles are ideal as they cook in a minute or two but you could also replace them with spiralized veg if you're looking to up your five a day even more.


You could make your own stock from scratch if you like, but I just pop in some fresh stuff from the butcher's counter. I prefer chicken but you can also do beef if you like. Cooked this way the chicken is so tender it just falls off the bones so makes it so ridiculously easy to shred. Particularly if you have a stand mixer, bung it in on a low speed for 30 seconds and pho's your uncle.


I'm so tempted by every single recipe in Gizzi's 'Healthy Appetite' book, next up has to be the Korean fried chicken which looks pretty special. I just have to make sure I can organise myself in advance so I can leave the wings to brine the day before. 


G I Z Z I ' S   C H I C K E N   P H O   W I T H   R I C E   N O O D L E S
(Recipe adapted from Gizzi Erskine's Healthy Appetite, serves 4)

1 whole medium chicken
400ml fresh chicken stock
2 onions, roughly sliced
3cm piece of root ginger, peeled and sliced
1 bulb of garlic cut in half horizontally
6 black peppercorns
1 star anise
1 cinnamon stick
1 lemongrass stalk, bashed
1tsp salt
2tbsp fish sauce
2tsp palm sugar
400g rice noodles

To serve:

2 red chillies, finely sliced
2-3 spring onions, green part finely sliced
1 onion, finely sliced into rings
small handful of coriander
a few sprigs of Thai basil
a handful of beansprouts
1 lime cut into 8 wedges

  1. Place the chicken in a large casserole dish with the stock, onions, ginger, garlic, peppercorns, star anise, cinnamon, lemongrass, salt, fish sauce and palm sugar. Top up with water to cover the chicken. Bring to the boil then cover and leave to simmer for 1 1/2 hours.
  2. Once cooked, take the chicken out and set aside to cool. Strain the stock from the vegetables and reduce down in a saucepan for 30 minutes until it reaches a rich broth. Taste and add more fish sauce or seasoning if required.
  3. Shred the chicken once cool enough to handle. Or use the dough hook or beater attachment on a stand mixer and beat on a slow speed to shred the chicken whilst warm. 
  4. To serve, place a bundle of noodles into each bowl, pour over the stock and add chillies, onions, herbs, beansprouts and a squeeze of lime. 


McVitie's Chocolate Digestive Truffles


There is no limit to the ways in which I'll justify the use of a biscuit. I love them so much that they're a very close runner up to my beloved brownies. Of course homemade biscuits are lovely, but did you know just how many ways there are to elevate regular shop bought ones? Its a lot.

We're not talking regular biscuit bases for cheesecakes, we're talking cakes, tiffins and my personal favourite, truffles.

 Yes, you can absolutely use the humble Digestive in truffles and yes, it tastes even better than you can imagine.

McVities sent me a stash of biscuits, some of which I may have eaten as a warm up, and some chocolate in order to make these truffles which have rapidly shot up my list of go-to recipes.


M C V I T I E S   C H O C O L A T E   D I G E S T I V E   T R U F F L E S
(Makes 20 regular sized truffles, scale up or down as required)

150ml double cream
250g dark chocolate, chopped
125g unsalted butter
15 McVitie's Digestives (around half a large pack)
150g chocolate spread
150g white chocolate
50g milk chocolate
  1. To start, make a chocolate ganache base for the centre by gently heating the cream over a low heat in a small pan. You don't need to boil or simmer the cream, just heat it until you can only hold a fingertip in the cream for a few seconds.
  2. Remove from the heat and add in the dark chocolate and butter, continually stirring until fully melted. Add the chocolate spread and mix again until well combined.
  3. Allow the mixture to cool down a little whilst blitzing the biscuits in a food processor or smashing in a sandwich bag with a rolling pin. You'll need something that resembles breadcrumbs or finer. 
  4. Add the crushed biscuits into the chocolate and stir well until everything is well coated. Chill this in the fridge for an hour to firm up.
  5. Line a tray or large plate with baking paper and use a teaspoons worth of mixture to roll into truffle shapes by hand. If the mix starts to become too soft to work with then pop it back in the fridge for 10 minutes to chill again.
  6. Place the truffles in the fridge once rolled to firm up again.
  7. Meanwhile, over a pan of barely simmering water, melt the white chocolate (or use 150g of milk chocolate if you'd prefer).
  8. To cover the truffles, remove from the fridge and use a skewer to dip them into the melted chocolate. Place onto the prepared tray and allow them to set a little, around 5-10 minutes.
  9. Melt the milk chocolate over a pan of barely simmering water also and pour into a piping bag or sandwich bag with the corner chopped to drizzle over the tops of the truffles.
I think these truffles are perfect served just from the fridge, but wherever you store them just ensure to keep them cool and they'll last up to a week.

These truffles aren't the speediest of things to make but you don't need to be Willy Wonka either. I made them over two days where I made the centres and left them overnight to firm up then covered them the next day. 

Thanks to my biscuity pals McVities for sending me a stash of chocolate!


Avocado Chocolate Bundt Cake


Each week's recipe planning is starting to turn into a challenge of what I can make with the leftovers in my fridge. I won't quite get to the the stage of using vegetable peelings to make cakes, I've seen it done before, but I definitely like to try and get the most out of everything.

You know when you bulk buy underripe avocados because its cheaper and they just take so damn long to ripen, then before you know it you have a whole bowl of ripe ones and eat guacamole every day. I wanted to try something a little different in using avocado as a replacement to fat or butter.

Strange it may sound, but it turns out avocado is great at making really light textured, moist cakes. This chocolate cake could be vegan, if you used the right milk and chocolate. Or it could be a almost, sort of lighter version of your regular chocolate cake.

Healthy-ish things aside, still perfectly fudgy and covered with a rich dark chocolate ganache.

I'm not quite up to changing my favourite brownie recipe to use avocados yet but apparently its pretty impressive too! Anyone else tried it?


A V O C A D O   C H O C O L A T E   B U N D T   C A K E
(recipe adapted from Ambitious Kitchen, makes one small bundt)

85g dark chocolate, chopped
160ml freshly brewed coffee
240g plain flour
60g caster sugar
90g dark brown sugar
70g cocoa powder
1tsp bicarbonate of soda
1/2 tsp salt
50ml vegetable/sunflower oil
1/2 large ripe avocado, mashed (approx. 80-100g)
2tsp vanilla extract
170ml almond milk

Dark chocolate ganache:

150g dark chocolate, chopped
300ml double cream
  1. Heat the oven to 180 degrees and thoroughly grease a bundt tin.
  2. In a small saucepan, gently melt the chocolate with the coffee, gently whisking as you go. Once fully melted, take off the heat and leave to cool.
  3. In a large bowl, whisk together the flour, sugars, cocoa powder, bicarbonate of soda and salt together to remove any lumps. Set aside.
  4. Beat together the avocado, oil and vanilla until smooth. Pour in the cooled chocolate mix and continue to beat until well incorporated.
  5. Add the wet ingredients to the dry ingredients and gently fold together until just combined.
  6. If the batter is too thick, add a few splashes of milk to loosen. 
  7. Pour into the prepared tin, smooth the top and bake for 35-45 minutes. Once cooked, a skewer inserted into the middle will come out clean. Remove from the oven and allow to cool fully in the tin before tipping out onto a plate.
  8. For the ganache, gently heat the cream over a low heat to warm. Just until you can hold your fingertip in the cream for 3-4 seconds. Take off the heat and add the chocolate. Continually whisk until smooth and glossy. To start, the mix will look spotty but once the chocolate is fully melted.
  9. Leave the ganache to cool and thicken slightly before drizzling over the cooled cake.


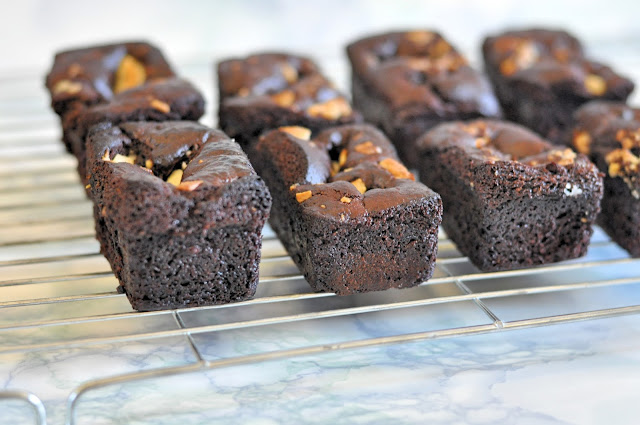
Double Chocolate, Peanut Butter and Banana Cakes


For those times when you absolutely need cake and you need it pretty sharpish.

Forget mug cakes because unless you have an absolutely huge mug, they just won't cut the mustard. Instead you need a blender cake. Throw in a little of what you have in the cupboard, quickly blitz in a blender and bake for 10 minutes. Utterly simple and super speedy.

My favourite combination is banana, peanut butter and double chocolate. But you could substitute the peanut butter for Nutella, Speculoos or any other biscuit spread. Swap the cocoa and white chocolate for whatever chocolate you like and some malt milk powder like Horlicks.

I can't proclaim that these are guilt free, but they are flourless, free of processed sugars and can also be dairy free.


D O U B L E   C H O C O L A T E   P E A N U T   B U T T E R   &   B A N A N A   C A K E S
(Makes 8-10 muffins or mini loaves)

1 medium/large ripe banana, peeled
150g peanut butter, Nutella or biscuit spread of your choice
40g cocoa powder, malt milk powder or custard powder
170g honey (approx. 3tbsp)
1 tbsp vanilla extract
1tsp bicarbonate of soda
pinch of salt
50g white, dark or milk chocolate, chopped
  1. Heat the oven to 200 degrees. Fill a muffin tray with cases or grease a silicone one.
  2. Throw all ingredients except the chocolate into a blender and blitz until smooth, about 60 seconds.
  3. Divide evenly between the muffin cases, about two thirds full and scatter over the white chocolate chunks.
  4. Bake for 8-12 minutes. Nearer 8 minutes for a small banana and up to 12 for a larger banana. Keep your eyes peeled!
Muffins improve with moist banana goodness over a few days but they can also be frozen for up to 6 months. You can always defrost in the microwave in emergencies...your future self will thank you!

I'm looking to test out some banana alternatives now, like cooked apple, sweet potato or pumpkin!