Food Photography Tips


If you hadn't figured by now, I love food. I guess my whole blog would be a sham if I didn't..."Sophie kind of, sort of, sometimes Loves Food" isn't quite the same. One of the key parts of featuring recipes and reviews on this corner of the Internet is ensuring that I try, to the best of my ability, to include a selection of bright, clear and simple images.

As with anyone's, these will improve over time. For example, take a look the archives and see how each post is a progression from the last. There's still a lot more I'd like to learn and improve on, but its more of a journey than a destination but I'm happy to say that I'm working on it.

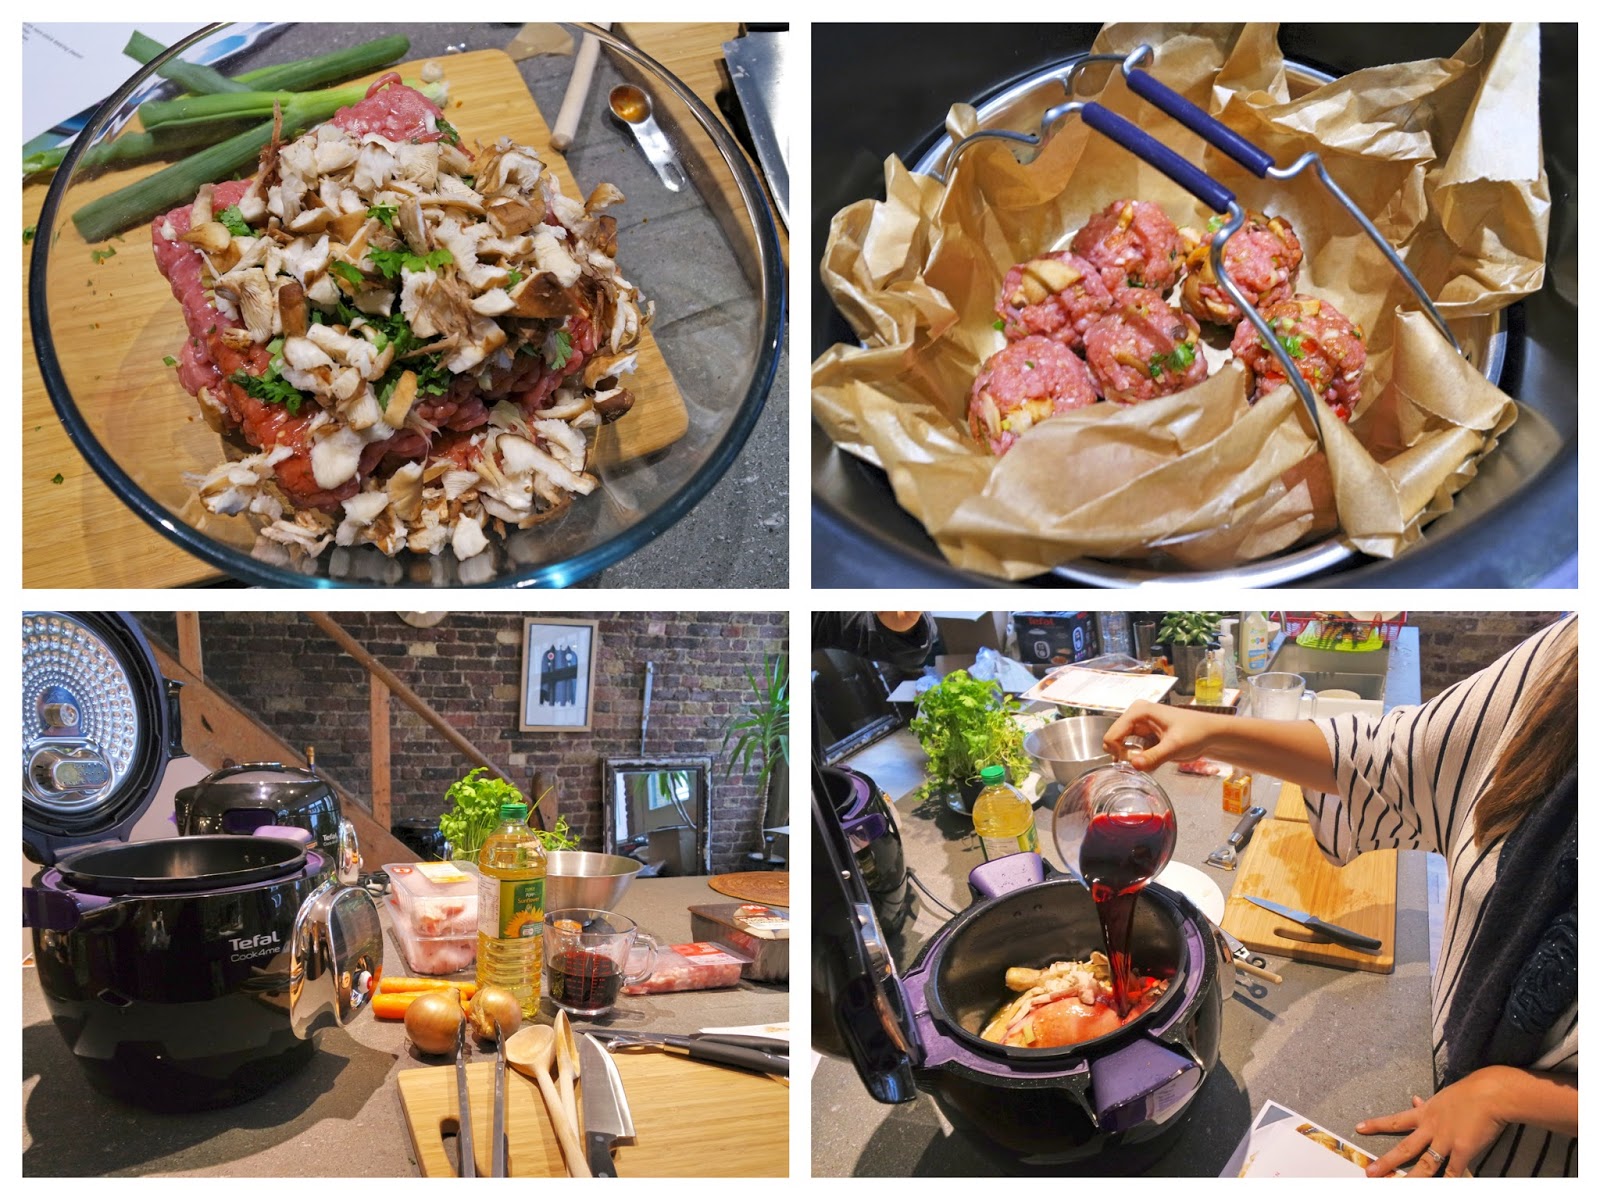
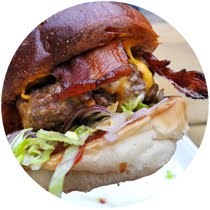
Earlier on in the month I was invited to attend a photography workshop at the Nikon School in London by Curry's and Joe Blogs. I was keen to use this as an opportunity to push myself, get over my fear of artificial lighting and try a few new things.

My normal photographing routine is fine for daylight, but there's only so much you can arrange your life around getting images for your blog come winter time when there's minimal natural light. I.e. baking at midnight to be able to take pictures before work in the morning!

During the workshop, I joined some bloggers from a range of backgrounds where Mr Nikon walked us through the basics of light and camera settings before being let loose on some photography sets. A selection of food was set up from fruit to Christmas cake with some studio lights. It was good to have a play around and challenge myself to get some natural shots with artificial lights I'm not used to working with.

It got me thinking hugely about food photography, my tips and how I can improve myself. So grab a cup of tea and off we go...


S T Y L I N G
  • Use simple plates and bowls with no large distracting prints. Blue and white colours tend to work best for food so keep a little selection of crockery and cutlery you like to use for photos.
  • In terms of props, keep it simple, too many can be distracting. Raw ingredients are good to use as props, for example, an unwrapped bar of chocolate used to make chocolate mousse peaking in the corner. Other great props include utensils or anything used in the process of making the food. This gives a good natural feel to photos. Think knives, chopping boards etc. Whatever you use as a prop, make sure its relevant to the dish itself or complimentary.
  • For backgrounds, keep a selection of wallpaper samples, tea towels, boards, floor tiles and vinyl sheets. I love these sheets of slate or marble vinyl, prices start from on £2.49 per metre and you can just wipe them clean and roll them up to store. Alternatively, as they are self adhesive so you can stick them to some thick card sheets. Old potato sacks from eBay or greengrocers are another favourite.
  • Keep plates and boards clean, especially for close up photos - there's nothing worse than smears or mess.
  • Some foods, particularly meats look best when plump and juicy so you may want to think about photographing them before fully cooked.
  • To make vegetables and meats look a little fresher, spritz with water or oil if you feel necessary.
  • Think of textures and colour. With a wooden worktop and chocolate cake, use a splash of colour with a tea towel or coloured plate, again ensuring that its complimentary. Layer up a few plates and bowls and different boards of different textures to add some dimension.

L I G H T I N G 
  • Ideally food looks best under natural lighting, never, ever use flash. But it is totally possible to achieve equally good photos with artificial lighting, especially during the winter months. Move around to find the best lighting in your home, I sometimes use my ironing board as a portable shelf to chase the light round different rooms of my flat.
  • If using natural daylight, shoot near a window using a bed sheet to diffuse light if needed, this will remove any harsh shadows. Sorted Food's YouTube video with Izy Hossack is good to get you started.
  • Use a reflector like this one to bounce either daylight or artificial light. This will also diffuse shadows and enhance the light you have. Alternatives to a reflector are large sheets of card or softboard placed side on to your food like this. Failing that, I've taken a side of an old cardboard box and covered it with tin foil in the past.
  • If you're really stuck for light, i.e. Winter evenings, then use some extra lighting. I have an old bedside lamp with the shade taken off which is more than enough. Think of a clock, your dish will be in the centre, background/kitchen counter at 12 o' clock, lamp or lighting at 3 o' clock, camera at 6 o'clock and a bounce card or reflector at 9 o' clock; just like this. Just be sure to set your white balance appropriately (I'll talk more about this later).

I D E A S
  • For recipe posts, try photographing the steps in the cooking process. You won't need to photograph every step, just a few to help readers understand the final image, especially if there's a specific technique. For example, soups don't always look to great as a final image, neither does bread and butter pudding.
  • You don't necessarily have to include images of the final thing, similar to above, be mindful of the cooking process and how you can best capture them.
  • Sometimes its good to add a little reality. By this I mean adding a hand stirring or chopping, just to show a human element rather than 'this looks like something from a cookbook I won't ever be able to make'.
  • Try a few different angles like shooting at 45 degrees, overhead or head on. I like to photograph large layer cakes from a low vantage to give the impression that the cake towers above the table. For slices of cake, try an overhead shot. Don't try anything too obscure, keep it simple. When shooting a particular dish, take a few images from each angle, its best to load them all onto your computer and have more of a selection to choose from.
  • Think about what exactly you're capturing. How about using a fast shutter speed to capture a drizzle of caramel on desserts or pouring a drink? I'd say from experience, you'll need a tripod for this, there's only so much you can balance yourself.

S O L U T I O N S
  • Colours aren't true to life?


    What you're looking at here is white balance. If the WB is off, then plates may look blue and food too orange under different lighting. Sometimes even the fancy technology in your phone or camera can't work this out itself, even on automatic mode. Either change the WB on camera to daylight, fluorescent etc depending on where you're shooting and the lighting. For example, fluorescent kitchen lighting is very blue/cool in colour and can make food and plates look equally as cool. Ever wondered why photos in the rest of your house or restaurants look orange? These lights tend to be much warmer which translates to orange food. You can make manual presets for your home or shooting setup. Essentially what happens is that you ask your camera to take a reading of something which is pure white, like a plate under your lighting. It'll then remember that and translate the rest of your colours in future shots taken under that preset as true to colour. Alternatively you can change the WB in photo editing software like Lightroom or Photoshop. (Another great free piece of software is Fotor which is good for beginners).
  • Photos are blurry or won't focus?


    If an image is blurry, not enough light is getting onto the sensor of your camera. To fix this you can do a number of things. Add more light to brighten the shot, hold your camera still by using a tripod or extend the shutter speed. By having a slower shutter speed, the shutter will be open for longer meaning more light will reach the sensor. Anything over 1/60 (that's one sixtieth of a second) is fine for handheld, but for anything slower you'll need a tripod.
  • Want your photos to pop that little bit more?


    Use software, including free versions to give a gentle boost of brightness, contrast and sharpening. Careful not to go overboard, food more than anything needs to look as natural as possible. If you don't have an expensive lens or even DSLR camera, then you can still get that shallow depth of field look where just part of the food is in focus and the background is blurred. Select the Macro setting on your phone or automatic camera and choose where you want to be focused.
  • Whatever you do you can't get your lighting and colours right!


    If you're using a DLSR or even a fancier compact camera. Shoot in RAW format. This is the purest type of image file your camera will take. Nothing is compressed or processed. Its essentially like saving layers of the different attributes to your photo. When you open it up in Lightroom or Photoshop, you'll be able to adjust each layer as necessary. For example, brighten up the image if too dark and give colours a little boost if too cool. You've got a lot more flexibility this way without ruining the integrity of your files. They'll also keep all that information to ensure best quality.
  • How best to store images?


    Keep duplicates of your photo files in different folders so whatever happens you'll have tip top photos or can go back to square one. I keep a folder for my RAW formats, these are the master copies but they don't have to be RAW if your camera doesn't support the files, just the biggest file size it will take. When it comes to editing, I'll create an 'Edit' folder and have duplicates of the master images, these will then be my working copies. Once I'm happy with my edits, I'll save copies into a 'Final' folder. Here, RAW files will now become TIFs which are the best format for maintaining the file integrity. Did you know each time you open a JPEG or similar file, crop it or edit it, some of the integrity will be lost? TIFs are still pretty large, so then duplicate your final selection into smaller JPEGs resized to fit your blog window. As an example, depending on the blog layout, photos will generally tend to be displayed in a size that's anywhere between 500-800 pixels wide. Any larger files will be shrunk to fit. I'll also save resized copies to suit different social media channels if I've got more time, for example, Twitter shows images as 440x220 pixels. Use this guide to find out what dimensions different social media profiles will display.

O T H E R   R E S O U R C E S
  1. '10 Household Items That Can Improve Your Food Photography' - Pinch of Yum
  2. 'A Visual Feast: Todd Coleman's Food Photography Tips' - Saveur
  3. 'Top 20 Tips for Food Bloggers' - Cookie + Kate
  4. 'Best Food Photography Tips From 3 Pro Photographers' - The Kitchn
  5. 'Food Photography Tips for Food Bloggers' - Nutrition Stripped
  6. Photography Archives - Food Blogger Central

I'd love to know your tips too and what props you like using?

Thanks to Currys and Joe Blogs for inviting me to their event at the Nikon School, here's their post of the evening for more photos and information.


Recipe: Dairy & Gluten Free Salted Chocolate Brownies


In a bid to expand my brownie repertoire, here's some dairy and gluten free ones I've been working on. 

For me, the most important thing is fudge and goo. Its essential for brownies to have plenty of fudge and plenty of goo. I'd put off making this kind of variation for a while thinking they just wouldn't cut the mustard. But you know what, its totally possible. 

Ground almonds help to keep everything super moist. Dark chocolate and dairy free spread make them super rich but still dairy free. I added a scattering of Maldon salt flakes to cut through the richness and partly because I love salted chocolate so much.


The dairy free spread I opted for was Pure sunflower spread, it takes less time to melt meaning that you're much closer to having a whole batch of brownies made in under 30 minutes.


And so, onto the recipe...

Dairy and gluten free salted chocolate brownies
(makes 8-10 large brownies)

3 medium eggs
275g light soft brown sugar
300g dark chocolate (dairy free)
1 tsp vanilla extract
good pinch of Maldon salt flakes
175g ground almonds
  1. Heat the oven to 180 degrees and grease and line a 20x34cm brownie tin.
  2. Gently whisk the eggs and sugar until just combined, set aside.
  3. In a small pan, melt the butter over a low heat. Once melted, remove from the heat and add the chocolate. Stir until fully melted and incorporated.
  4. Whisk the eggs and sugar once more, this time until pale and fluffy, about 3-5 minutes.
  5. Pour in the chocolate mixture and vanilla and beat until combined.
  6. Tip in the salt and ground almonds and gently fold until the mixture is just combined.
  7. Pour into the prepared tin, smooth the top and bake for 22-25 minutes.
  8. Once cooked, the brownies should have a smooth flaky top and a little wobble in the middle. Leave to fully cool for the brownies to firm up.
The best and easiest way to slice brownies is straight from the fridge. That way they'll be firm enough to neatly slice and when back to room temperature they'll be deliciously fudgey again.


Thanks to Pure for sending me a sample of their spread!


Recipe: Roasted Pear Cake with Browned Butter Glaze


All cakes made with fruit and vegetables are healthy, right? Ripe pears are roasted and then mashed before adding to a spiced cake mix. A browned butter glaze has a completely different dimension to regular glazes. Rich and nutty, and only minutes to make.

This cake is great to make ahead, it'll last you through the week too if you're good at self-control. Although if that's you then why are you reading this? No self-control here please, just a lot of food.

If you're not a fan of pears, then try apples. Homemade roasted apples preferably, but a jar of apple sauce would also work at a push.


Make a bundt, a round cake or maybe even a traybake. This is one of those cakes that's so easy to slice and serve. It doesn't even need the glaze if its too rich for you.

If you have any smashed pears left, I love saving them for breakfast the next day - so good on porridge!

Roasted pear cake with browned butter glaze
(recipe adapted from Food 52, makes one bundt or a xyz" cake)

The ingredients are converted from cup measurements, I did them as I went along and always found the quantities to look a little odd!

1.1kg conference pears (approx. 9 medium pears)
3tbsp water
3tbsp demerara sugar
juice of 1 lemon
475g plain flour
2tsp bicarbonate of soda
1tsp salt
1 1/2 tsp ground cinnamon
1 1/2 tsp ground ginger
130g unsalted butter, softened
100ml vegetable/sunflower oil
300g soft light brown sugar
2 eggs
100g creme fraiche

Browned butter glaze

6tbsp unsalted butter
200g icing sugar, sifted
2-4tbsp whole milk
pinch of salt

  • Heat the oven to 190 degrees.
  • Peel, core and chop the pears into large chunks. Put in a large baking tray and toss with the water, sugar and lemon. Cover with foil and bake for  25-30 minutes.
  • Once cooked, the pears should be slightly soft and you'll be able to mash them with a potato masher. Leave some larger chunks. Place in a bowl and leave to cool.
  • Turn the oven down to 180 degrees ready for the cake and grease the cake tin.
  • In a large mixing bowl, whisk the flour, bicarbonate of soda, salt and spices to remove any lumps.
  • In a stand mixer, beat the butter, oil and sugar together until smooth. Add the eggs into the mix, beating well after each addition.
  • Add the creme fraiche and 500g of the mashed pears and continue to mix until well incorporated.
  • Gently fold in the flour, being careful not to overwork the mix.
  • Pour into the prepared cake tin and bake for 55-65 minutes. A skewer inserted should come out clean.
  • Leave to cool in the tin for 10 minutes before inverting onto a wire cooling rack.
  • To make the glaze, melt the butter over a low heat. Once its melted, it'll start to bubble. Leave on the low heat until it starts to brown and smells nutty. Remove from the heat and pour into a bowl.
  • Once the butter has cooled a little, tip in the icing sugar, some milk and salt and whisk until smooth. Add a splash more milk if needed to get a pouring consistency.


An Idiots Guide to Stir Up Sunday


Stir up Sunday is coming so you'd best get your wooden spoons and brandy at the ready.

On Sunday, the last one before advent, heady scents of cinnamon, cloves, citrus and dried fruits waft around the kitchen. British tradition is to make a Christmas pudding, but I generally tend to opt for a Christmas cake with plenty of time to soak in booze ahead of Christmas day.

Dating back to Victorian times Stir up Sunday gets its name from the 'stirring up' of mincemeat and Christmas pudding mix, typically the time where children get to help out in the kitchen. Each family member will take it in turns to stir the mix clockwise, making a wish with the idea that it would impart God's blessings to all those who eat it. But only under the strict order that it's made on Stir up Sunday and that you really do stir it clockwise.

If you don't, like I haven't (blogger dedication), then its believed that this invokes the work of the Devil. Well, its been nice knowing you guys...!

And for this, we have Prince Albert to thank with his love of rich, fruity puddings from his German childhood. Albert introduced this tradition of Christmas pudding, favouring a steamed version. The difference being that pudding contains suet and is baked, and the cake is baked.

The benefit of making it in advance is not only to ensure that its soaked up optimum levels of brandy, but also to allow the flavours to intensify and colours to darken.

Even better, allow the dried fruit to soak up in brandy on Saturday night. On Sunday morning they'll be perfectly plump and juicy ready to stir up.


Christmas cake
(makes one round 7" cake)

75g dried cranberries
75g dried apricots
400g mixed fruits (currants, raisins and sultanas)
40g candied peel
2tbsp brandy or amaretto
175g unsalted butter, softened
175g dark muscavado sugar
175g plain flour
1/4 tsp ground nutmeg
1/4 tsp ground cinnamon
1/2 tsp ground mixed spice
3 large eggs
40g flaked or chopped almonds
1/2 tbsp black treacle or golden syrup
zest of 1/2 a lemon
zest or 1/2 an orange
  1. Measure out the fruit and leave to soak overnight in a large bowl covered in brandy.
  2. Line a 7" round baking tin with a double layer of baking paper round the sides and base and grease. Heat the oven to 140 degrees.
  3. In a large mixing bowl, cream together the butter and sugar until pale and creamy.
  4. Add the flour, spices, eggs, almonds, treacle and zests and continue to beat until well incorporated.
  5. Add in the dried fruit and brandy and gently fold together.
  6. Pour the batter into the baking tin, smooth over the top and place a double layer sheet of baking paper on top.
  7. Bake for 4 hours, until a skewer inserted into the middle comes out clean. Allow to fully cool before inverting from the tin.

Feeding the cake

Once cool, pierce the top of the cake with a skewer and pour over a little brandy to soak in. Other spirits like amaretto also work well. Wrap well in a layer of baking paper then foil and leave in a cool dry place. Continue to feed the cake at regular intervals, say once or twice a week ensuring to leave the baking paper in place to keep the moisture in. 

If you're not a fan of ultra boozy cakes, then alternate between doses of alcohol and orange juice.

Keep feeding your little fruity baby until two weeks before Christmas.

Decorating the cake

One the second week of December, cover the cake with marzipan. You can buy it pre-rolled or alternatively I love this recipe to make your own orange, cinnamon or ginger marzipan - so much better than shop bought and incredibly easy!

Wrap it up once more for the final week. This will allow the marzipan layer to firm up making it much easier to apply frosting.

For frosting, there's a number of different methods and styles, it just depends on what you want to go for.

Complete beginner? Buy some ready rolled white icing, place centrally on the top of your cake. Use the warmth of your hands to gradually and gently smooth round the edges from top to bottom. Trim off an excess and tie a big festive ribbon around for decoration.

Alternatively, head over to Pinterest for some more ideas. I've done a lot of pinning to save you some time...

Follow Sophie Loves Food's board Christmas Cake - Stir Up Sunday on Pinterest.


12 Instagram Feeds to Follow for Foodies


Instagram is probably one of my most favourite, and most visited apps. I like to flick through my feed and the explore tab approximately eleventy million times a day. Its great for productivity...who am I kidding? Its great for ideas and inspiration. Most of the accounts I follow are food related so I thought I'd share some of my favourites, the ones that get the most double taps from me!


I never thought I'd love the look of vegan food so much. Bright and wholesome, I could get lost scrolling through for hours. Maya makes me feel like I can cook vegan too.

Berlin-based Marta posts her breakfast and travel snaps. Your porridge has never looked so boring. She also has some great city guides on her blog with incredible photos. You see that burger? Of course its ok to have a burger for breakfast. I won't judge.

Don't be fooled by the name, Amy is super talented. Plenty of cookies and gorgeously decorated cakes. Those cookies? Yep, there's a lot of them. Its like she knows exactly what I want to see.

Full of London, great baking and street food. Simon's feed is what I daydream of most days. Those brownies for example...incredible. He's been getting festive with gingerbread recently and I can't wait to see more.


I'm totally envious of everything Nicole bakes and I'm not even scared to say it. Not only has she got the most amazing blog name, her photos are awesome! Themed cupcakes and real showstoppers, find me someone who wouldn't one of those birthday cakes.

Claire's feed will leave you craving pretty food. Everything looks perfect, wholesome and so much better than your dinner. Her feed is the first place I saw matcha butter and cinnamon spiced carrots. Come and feed me please Claire?

My ultimate favourite Instagram feed. Be warned, this will make you feel like your meals and photos aren't good enough. Rebecca has a way of capturing everything in such an organic, natural way. She also has a great hand model which makes me think of how useful it could be having an extra pair of hands for photos every now and then!

Plenty of doughnuts, cookies and cupcakes. Kathryn makes proper food, no garish colours or anything artificial, just the way it should be. Most are gluten free with recipes featured on her blog.


Magda is queen of the flat lays. I never knew that just octopus or vegetables could look so great. Again, no frills which is exactly how food should be. 

Megan, Queen of emojis, is the sassiest of my Instagram feed. Food with eyes, bright colours and awesome snacks. Her profile picture is her wearing a burger tshirt, eating a burger...we're soul mates.

Google translates this to 'everyday happiness', so sweet. Norway-based Lise posts frequent photos of stunning interiors and cakes. I'm totally envious of her little country kitchen and would love to DIY a blue sideboard just like hers/

Megan's bio: "I make things, I photograph them, I eat them." My hero. Plenty of chocolate and pastry and not to mention that her photos are just beautiful. She's pretty badass, she rides a big motorbike and bakes.


So that's it, my top 12 Instagram foodies! 

And whilst we're on the subject, besides the surge in spam followers I've had recently, Frankie's guide to Instagram is pretty helpful. She covers everything from hashtags to scheduling so well worth a read.

Let me know who your favourite Instagrammers are, I'm sure I can find even more time in my day to do some more double tapping!

Image credits to all the Instragrammers linked. I've also taken their blog names where appropriate.


Cooking with the Tefal Cook4Me


Today I'm not saving the best until last. Especially when it includes a steamed pudding from scratch in just 35 minutes. A chocolate croissant pudding with salted caramel to be exact. No bread and butter pudding can trump this.

How, you might ask? Tefal's Cook4Me is an intelligent gadget that takes the stress out of cooking and speeds everything up. Think of a slow cooker, but quicker, you throw everything in and it'll work its magic. And you won't even need any of your own recipes.

Intrigued? So was I when Tefal popped over an invite to try it out. 


Sitting a little taller than a regular slow cooker or pressure cooker, the Cook4Me will make meals and desserts for 2-6 people. The inside dish is removable, perfect for serving straight at the table and making it easy to clean. It also comes with a removable steaming tray, ready for rice, meat, fish and vegetables.


This gadget comes with 50 pre-programmed recipes for meals and desserts. Simply select the recipe on the digital screen and it'll walk you through step-by-step what to add and when. 

For example, it'll preheat itself with oil to brown meat and onions, then tell you when to add the rest of the ingredients like stock and sauces. Once everything's in, give it a quick mix and close the lid. It'll rapidly steam or pressure cook your meal for you. The result is a perfectly cooked meal based on the number of servings selected and the weight of ingredients. There's also an option to reheat meals or keep warm if you're not quite ready to eat. 


I teamed up with Megan and Binny in a cook off against Sandy, Daniella and Marie to put the Cook4Me through its paces. Armed with ingredients and a Cook4Me each we set to work.

Between us, we made a 3 course meal with vegetarian options:

For starters, Asian pork meatballs and butternut squash soup. The Asian meatballs with shitaki and chilli took only 10 minutes to cook in the steaming basket. And the soup, 15 minutes. All the preparations we needed were to roughly chop vegetables for the soup and to mix the pork mix and roll the meatballs.

And onto the mains, farmers chicken cooked in red wine (15 minutes) and a vegetarian sausage bean stew (9 minutes). For prep, browning the chicken and sausages and then throw everything else in.


Throughout the process, the on screen guide will not only walk you through the preparation steps but also its cooking progress. A countdown timer will be displayed, a few quick beeps and then the steam will be released. You can either leave it to stay warm or open up and serve.


By this stage I was impressed. Little did I know that the dessert would blow everything else out of the water. Using the on screen digital countdown as a guide, 9 minutes till the sausages were done, we set to prepping the pudding. 

A chocolate croissant pudding. Chunks of croissants, chocolate, salted caramel and fruit drowned in cream, eggs and sugar. Wrapped up in a foil jacket, we popped these in a straight into the Cook4Me, swapping the sausage dish for the steamer basket. 


Whilst working through our main meal, the croissant pudding was left to steam for 35 minutes. Mind blowing. Usually a steamed pudding would take at least an hour or two.

What I loved best about the Cook4Me is that not only are the pre-loaded recipes so vast, you can also use a manual setting. Simply choose roughly what you need from the screen, like to steam rice or brown meat, and away you go. 

Whatever recipe you'd usually use in a slow cooker or pressure cooker, you'll be able to use here. Just don't forget most meals will be cooked in under 30 minutes! You can set it to a delayed start as its so quick, that way you'll be ready for dinner at any time you choose.

The verdict? Seriously impressed at the speed of cooking with no loss in flavour or tenderness that you gain from slow cooking meat. Could this replace my slow cooker? Most probably.

The Tefal Cook4Me retails for around £249. Much more expensive than a regular slow cooker or pressure cooker. But with 5 intelligent cooking modes and servings of up to 6 people, this could quite easily take over how you cook daily. Well worth it I'd say.

Dear Father Christmas...!

Thanks to Tefal for hosting us and letting us loose in the kitchen. I didn't receive payment for this post, all opinions are my own.

Recipe: Nutella Stuffed Cookies


I probably should put myself on a cookbook ban. I wouldn't say I have too many, that's just not possible, I just don't use them all as much as I should. In a bid to bake more from my favourite books I've indexed a few pages to try over the coming weeks. 

Primrose Bakery's newest addition, 'Everyday', is fast becoming one of my favourite books of all time. I love how recipes are divided into seasons and Stuart's photos are incredible.

The book fell open on these Nutella cookies from the Autumn section when I first received it, so on went the oven and out came the giant jar of Nutella I'd been trying to hide in the back of my cupboard.

Perhaps I over-baked these a little, with less ooze than I'd like, but I still can't wait to make plenty more batches of dough to store in the freezer, for emergencies...*ahem*.

This recipe is super simple and easy to remember. I have a few jars of various biscuit spreads like the Malteser one that I recon would be great in this too.


Nutella stuffed cookies
(Recipe adapted from Primrose Bakery's 'Everyday', makes 10 cookies)

140g unsalted butter
140g soft brown sugar
140g Nutella, plus extra for filling
185g plain flour
25g cocoa powder
1 large egg
  • Heat the oven to 180 degrees and line a baking sheet with baking parchment.
  • Cream together the butter and sugar until light and fluffy with a hand or stand mixer on a medium speed. Add the 140g of Nutella and beat until smooth.
  • Add the flour and cocoa powder, then the egg and mix until a dough forms.
  • For the cookies, divide the mix into 20 evenly sized balls. Roll around to shape, flatten into discs with the palm of your hand. Add a tablespoon of each to the centre of each cookie, top with another disc and press down the edges to seal in the Nutella.
  • Leave plenty of space round each cookie as they will grow in the oven. You can always use a second baking tray or make them in batches, just to be safe.
  • Bake for 12 minutes until both the edges and centre look firm.
These cookies will only last a few days in an airtight container, so you'd better eat them up quickly.


I think this may be my go-to cookie recipe now!


Recipe: Pumpkin Loaf with Cream Cheese Filling and Maple Drizzle


Even though its November, there's still time for pumpkin, right?

If you haven't gathered by now, one of my favourite type of cakes to make are loaf cakes. As simple or as fancy as you need, these guys are so versatile. I had some leftover homemade pumpkin purée and decided to make another variation of my favourite pumpkin bundt. So yeah, you've guessed it, I've made every different variation possible.

Spiced pumpkin loaf with cream cheese swirl and maple drizzle
(recipe adapted from Averie Cooks, makes 1lb loaf)

Spiced pumpkin loaf:

1 egg
260g pumpkin purée
80g soft light brown sugar
55g caster sugar
50ml vegetable oil
80g Greek yogurt
2tsp vanilla extract
2tsp ground cinnamon
1tsp ground ginger
1/2tsp ground nutmeg
150g plain flour
1/2tsp baking powder
1/2tsp bicarbonate of soda
pinch of salt

Cream cheese filling:

1 egg
115g full fat cream cheese
55g caster sugar
30g plain flour
  1. Heat your oven to 180 degrees and grease and line a 1lb loaf tin.
  2. In a large bowl tip in the egg, pumpkin, sugars, oil, yogurt, vanilla, cinnamon, ginger and nutmeg. Whisk until smooth and everything is incorporated.
  3. In a separate bowl, whisk together the flour, baking powder, bicarbonate of soda and salt to remove any lumps.
  4. Gently fold the flour into the pumpkin mix being careful not too over mix and set aside.
  5. To make the cream cheese filling, whisk together the egg, cream cheese, sugar and flour until smooth.
  6. Pour two thirds of the pumpkin mix into the prepared loaf tin. Gently pour over the cream cheese and smooth. Finally, pour over the remaining pumpkin mix, smooth once again and bake in the oven for 40-45 minutes. A skewer inserted should come out clean.
To decorate, I mixed a little icing sugar with maple syrup and crushed over some walnuts.

NB baking times may vary depending on the water content of the pumpkin. I tend to find that homemade purée is much more watery than a can of Libby's.